Infrared photography is a fascinating way to explore the invisible world beyond the visible spectrum. Unlike traditional photography, it captures infrared light, which is not visible to the human eye. This results in unique and ethereal images. When I first experimented with this technique, I used a Canon EOS R5 paired with a 50mm f/1.8 lens. Setting the ISO to 100, aperture at f/16, and shutter speed at 1/30s, I captured stunning landscapes at Lake District National Park. Additionally, using an IR filter, specifically the Hoya R72, enhances the contrast and surreal quality of the images. It’s crucial to focus before attaching the filter, as IR light shifts the focal point. Furthermore, post-processing software like Adobe Lightroom can be used to adjust white balance and enhance colors. This photography style offers endless creative possibilities, allowing you to see familiar scenes in a new light.
How Infrared Photography Works
Infrared photography captures light that is not visible to the human eye, specifically in the infrared spectrum. This unique technique reveals a world of surreal beauty, transforming ordinary scenes into ethereal landscapes. The process involves using a camera with a special infrared filter or a converted sensor to capture infrared light. When I first ventured into infrared photography, I used a Canon EOS R5 with a 720nm infrared filter. This setup allowed me to capture stunning landscapes in the Australian outback, where the dramatic contrasts between red soil and lush greenery were accentuated.
To achieve the best results, selecting the right settings is crucial. Setting your camera to ISO 100 minimizes noise, especially in bright conditions. Pair this with a 50mm f/1.8 lens for sharp image quality. Using a tripod is essential to avoid camera shake, particularly when you are dealing with longer exposure times. In one of my favorite shots of the Great Ocean Road, I set my aperture to f/11 and a shutter speed of 1/15s. This allowed me to capture the sweeping coastline with incredible clarity.
Understanding Infrared Light
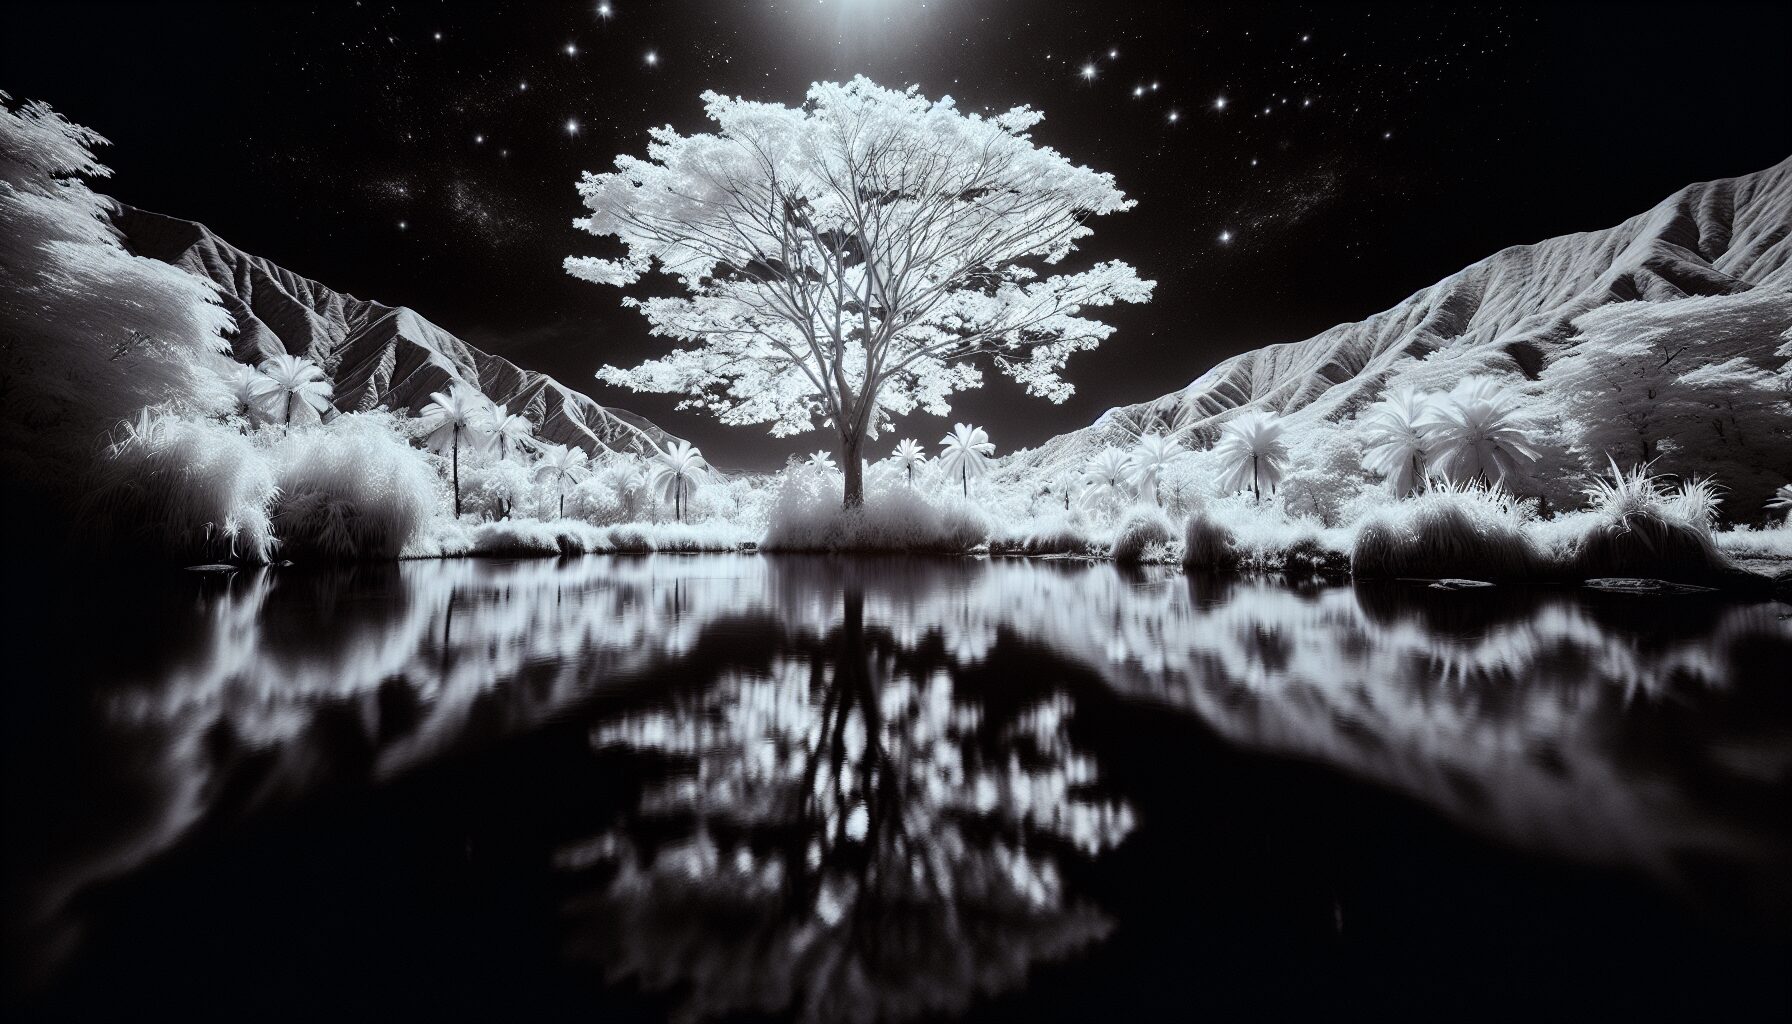
Infrared light lies just beyond the visible spectrum, between visible light and microwave radiation. It allows photographers to capture wavelengths from approximately 700nm to 900nm. This range changes how colors appear, often turning foliage into bright whites and blue skies into deep blacks. The challenge and charm of this technique come from these unexpected transformations. During a visit to the Blue Mountains, I was amazed at how the lush eucalyptus trees turned ghostly white against the darkened sky.
Furthermore, post-processing plays a vital role in enhancing infrared images. Software like Adobe Lightroom or Photoshop allows for adjustments to contrast and white balance, enhancing the surreal effects. I often use these tools to tweak my images, bringing out the unique tones that infrared photography offers. For example, swapping red and blue channels can create a stunning faux-color effect, adding to the otherworldly atmosphere.
In Australia, the bright, sunlit landscapes provide ideal conditions for exploring infrared photography. The intense sunlight helps to highlight the contrasts that infrared captures so beautifully. Whether you are photographing the iconic Uluru or the serene beaches of Queensland, this technique can add a new dimension to your photography. Organizations like Australian Photography and Canon Australia offer resources and workshops to help enthusiasts delve deeper into this fascinating aspect of photography.
Essential Equipment for Infrared Photography

Capturing the hidden beauty of the world through infrared photography can be an exhilarating experience. However, it requires specific equipment to transform ordinary scenes into ethereal masterpieces. Let’s dive into the essential gear needed for this unique art form, particularly relevant for those of us exploring the diverse landscapes of Australia.
First and foremost, choosing the right camera is crucial. Many photographers in Australia swear by the Canon EOS R5. Its full-frame sensor and 45-megapixel resolution make it an excellent choice for capturing the nuanced details in infrared images. Additionally, the Nikon D850 is another popular model due to its compatibility with infrared filters and robust performance in challenging environments.
Speaking of filters, you’ll need a dedicated infrared filter to block visible light while allowing infrared wavelengths to pass through. The Hoya R72 filter is widely recommended for its effectiveness and durability. This filter is particularly useful when photographing Australia’s pristine beaches and rugged outback, where sunlight is abundant. When I first ventured into infrared photography, I paired my Canon EOS R5 with the Hoya R72. Shooting at ISO 100, f/16, and a 1/30-second shutter speed, I was able to capture stunningly surreal landscapes.
Additional Equipment and Techniques
Lens choice is another important consideration. A 50mm f/1.8 lens is a versatile option, offering sharpness and depth of field control. For those looking to shoot wide landscapes, a 16-35mm f/4 lens can provide expansive views. However, always remember to use a lens hood to minimize flare, especially under the intense Australian sun.
A sturdy tripod is indispensable for infrared photography due to the longer exposure times often required. The Manfrotto BeFree Advanced is a favorite among Australian photographers. Its lightweight design and stability make it suitable for hiking through the Kimberley or setting up along Sydney’s coastal cliffs. Additionally, using a remote shutter release can further reduce camera shake, ensuring crisp images.
Lastly, post-processing software is essential for refining your infrared images. Adobe Photoshop is a go-to choice for many professionals. It allows for detailed adjustments and color channel swapping, which can dramatically enhance the final image. According to Adobe, their software provides comprehensive tools for photographers.
Exploring infrared photography in Australia offers endless possibilities. With the right equipment and techniques, you can unveil a world that is invisible to the naked eye.
Techniques for Capturing Stunning Infrared Images

Capturing stunning infrared images in Canada requires both technical skill and a touch of creativity. One of the first things to consider is your camera choice. Many photographers recommend the Canon EOS R5 for its versatility and performance. With a full-frame sensor, this camera can capture the subtle details and contrasts necessary for breathtaking infrared shots. Pair it with a 50mm f/1.8 lens for sharpness and depth.
Next, consider your camera settings. For infrared photography, I often set my ISO to 100 to minimize noise. I find an aperture of f/8 works well, offering a good balance between depth of field and sharpness. Depending on the lighting, a shutter speed of around 1/30s is ideal. However, always experiment with these settings based on the specific conditions of your shoot.
Choosing the Right Filter and Location
Filters are crucial for capturing infrared light. A 720nm or 850nm infrared filter will help block visible light, allowing only infrared wavelengths to pass through. This results in the distinct, ethereal look infrared images are known for. Attach the filter to your lens and adjust your camera’s white balance accordingly. Setting a custom white balance by pointing the camera at green foliage often yields the best results.
Location is another key factor. In Canada, the natural landscapes offer endless possibilities. From the lush forests of British Columbia to the serene lakes of Ontario, the reflective surfaces and vibrant vegetation can enhance your infrared compositions. On a trip to Algonquin Park, I captured stunning images of the pine trees and shimmering lakes. The infrared effect turned the foliage into a surreal, snowy landscape, even in summer.
Post-processing also plays a significant role in infrared photography. Software like Adobe Lightroom can help refine your images. Adjusting the contrast and brightness can emphasize the unique qualities of the infrared spectrum. Swapping color channels in Photoshop can create a striking false-color effect, further enhancing your work.
Finally, connect with local photography groups. They can provide insights and advice based on their experiences with the Canadian landscape. Organizations such as Canadian Association for Photographic Art offer valuable resources and communities for photography enthusiasts. Experiment, practice, and let the beauty of Canada’s diverse landscapes inspire your infrared photography adventures.
Post-Processing Tips for Infrared Photos

Editing infrared images can transform your photos into stunning, otherworldly scenes. When I first started using my Canon EOS R5 with a 50mm f/1.8 lens, I found that post-processing was key to enhancing the surreal quality of infrared captures. One of the first steps is to adjust the white balance. Setting your camera to a custom white balance before shooting can help. However, fine-tuning in post-processing is often necessary. In Adobe Lightroom, use the temperature and tint sliders to achieve the desired effect.
Swapping the red and blue channels is another effective technique. This can be done in Adobe Photoshop using Channel Mixer. Set the red output channel to 0% red and 100% blue, then set the blue output channel to 0% blue and 100% red. This swap gives the sky a striking blue hue, enhancing the surreal effect. Additionally, consider adjusting the contrast and clarity. Infrared images often benefit from increased contrast, making them pop. Be cautious, though; too much can lead to unnatural results.
Enhancing Details and Colours
Details play a crucial role in making infrared photos stand out. I recommend using the sharpening tool in Lightroom. Set the radius between 0.5 to 1.0 to enhance edges without adding too much noise. My personal approach includes masking, which ensures only the necessary areas are sharpened. Furthermore, noise reduction is essential. Infrared photography can introduce noise, especially at higher ISOs. Use the luminance slider sparingly to reduce grain while maintaining detail.
Colour adjustment is another vital aspect. Infrared images often have a limited colour palette. Experiment with the HSL sliders in Lightroom to bring out unique hues. For instance, you might want to desaturate greens to make foliage appear more ethereal. Additionally, consider using split toning to add creative colour casts. This can enhance the mood of your image, giving it a more artistic feel.
Finally, always save your work in a non-destructive format. I recommend using PSD or TIFF files. This ensures you can revisit and adjust your edits later without losing quality. With practice, these post-processing techniques will help you master the art of infrared photography. For more resources, consider checking out `New Zealand Institute of Professional Photography` or `Adobe Systems` for tutorials and workshops. Achieving the perfect infrared image is a rewarding journey.
Common Challenges and How to Overcome Them
Infrared photography presents unique challenges, especially when capturing the stunning landscapes and vibrant environments of Australia. One common issue is achieving the right exposure. Infrared light behaves differently from visible light, so your camera’s meter might not give accurate readings. I experienced this firsthand while shooting with my Canon EOS R5 on a sunny day at Bondi Beach. Setting the ISO to 100, aperture to f/8, and using a shutter speed of 1/15s helped balance the exposure. Experimenting with these settings can lead to stunning results.
Another challenge is focusing. Infrared light focuses at a different point than visible light. This can cause images to appear soft or out of focus. When I first tried using my 50mm f/1.8 lens, I struggled with this issue. The solution was to manually adjust the focus. I used the live view mode to zoom in and fine-tune the focus. This method worked well for capturing the intricate details of the eucalyptus leaves glowing in infrared.
Addressing White Balance and Hot Spots
White balance is another hurdle. Standard settings often lead to strange color casts in infrared images. Custom white balance settings can correct this. I set the white balance on a patch of green grass, which resulted in more natural-looking infrared photos. This technique is particularly effective when photographing the lush foliage of the Daintree Rainforest.
Hot spots can also appear in images. These are bright areas caused by internal reflections within the lens. This is more common with certain lenses. Testing different lenses can help identify which ones are prone to this issue. I found that my 24-70mm lens was particularly susceptible. Switching to a prime lens, like a 35mm f/1.4, resolved the problem. Additionally, using a lens hood can minimize these reflections.
Finally, post-processing is crucial in enhancing infrared images. Software like Adobe Lightroom allows for adjustments that bring out the ethereal beauty of infrared landscapes. I often use the channel swap technique to create that classic infrared look. Local resources, such as workshops offered by Australian Centre for Photography, provide excellent opportunities to learn and refine these skills. With practice and patience, these challenges become easier to manage, allowing you to capture Australia’s unique beauty in a new light.
Conclusion
To sum up, infrared photography offers a unique way to explore and capture the world beyond the visible spectrum, revealing extraordinary and ethereal images. The article emphasizes the importance of using the right equipment, such as the Canon EOS R5 and specialized infrared filters like the Hoya R72, to achieve stunning results. Essential techniques include selecting appropriate camera settings, focusing before attaching filters, and using tools like Adobe Lightroom and Photoshop for post-processing. These adjustments can enhance the surreal quality of infrared photos, transforming ordinary scenes into captivating landscapes. Overcoming challenges like exposure, focus, and white balance is crucial, especially in diverse environments like Australia’s landscapes. With patience and practice, photographers can master this art form and unlock endless creative possibilities. Embrace this fascinating photography style and see the world in a new light. Happy shooting!
Continue Exploring
Unleash the full potential of your photography skills by diving into the world of panoramic shots. Our expert's guide will transform your perspective and elevate your art to new heights.
Frequently Asked Questions
What equipment do I need to get started with infrared photography?
To begin with infrared photography, you’ll need a camera that can capture infrared light. This can be a converted DSLR or mirrorless camera, or one that already has infrared capabilities. Additionally, you’ll need an infrared filter that fits your lens, which blocks visible light and allows infrared light to pass through. A tripod is also recommended for stability, especially during long exposures.
How do I edit infrared photographs for the best results?
Editing infrared photographs typically involves adjusting the white balance, switching color channels, and enhancing contrast to bring out the unique characteristics of infrared imagery. Software like Adobe Lightroom or Photoshop can be used for post-processing. You can also experiment with different color profiles and effects to achieve the desired artistic look.
Why do infrared photographs have a distinct look compared to regular photos?
Infrared photographs have a distinct look because they capture light beyond the visible spectrum, which creates unique effects such as white foliage and dark skies. This is due to the way infrared light is absorbed and reflected by different materials, resulting in images that often appear ethereal and surreal compared to standard photography.
Leave a Reply