When you’re figuring out how to capture stunning star trails, especially in our beautiful Pakistan, it’s all about the basics. The key is understanding techniques for Pakistani photographers in 2025. I remember my first shot at Fairy Meadows; the sky was a blanket of stars. I used a full-frame sensor DSLR and set my shutter speed to 30 seconds. A sturdy tripod is crucial to eliminate shake. Locations like Deosai National Park provide minimal light pollution, letting the stars shine. To enhance your photos, experiment with ISO settings to find that perfect balance.
Related: The Ultimate Guide to Night Sky Photography in Pakistan: Capture the Cosmos
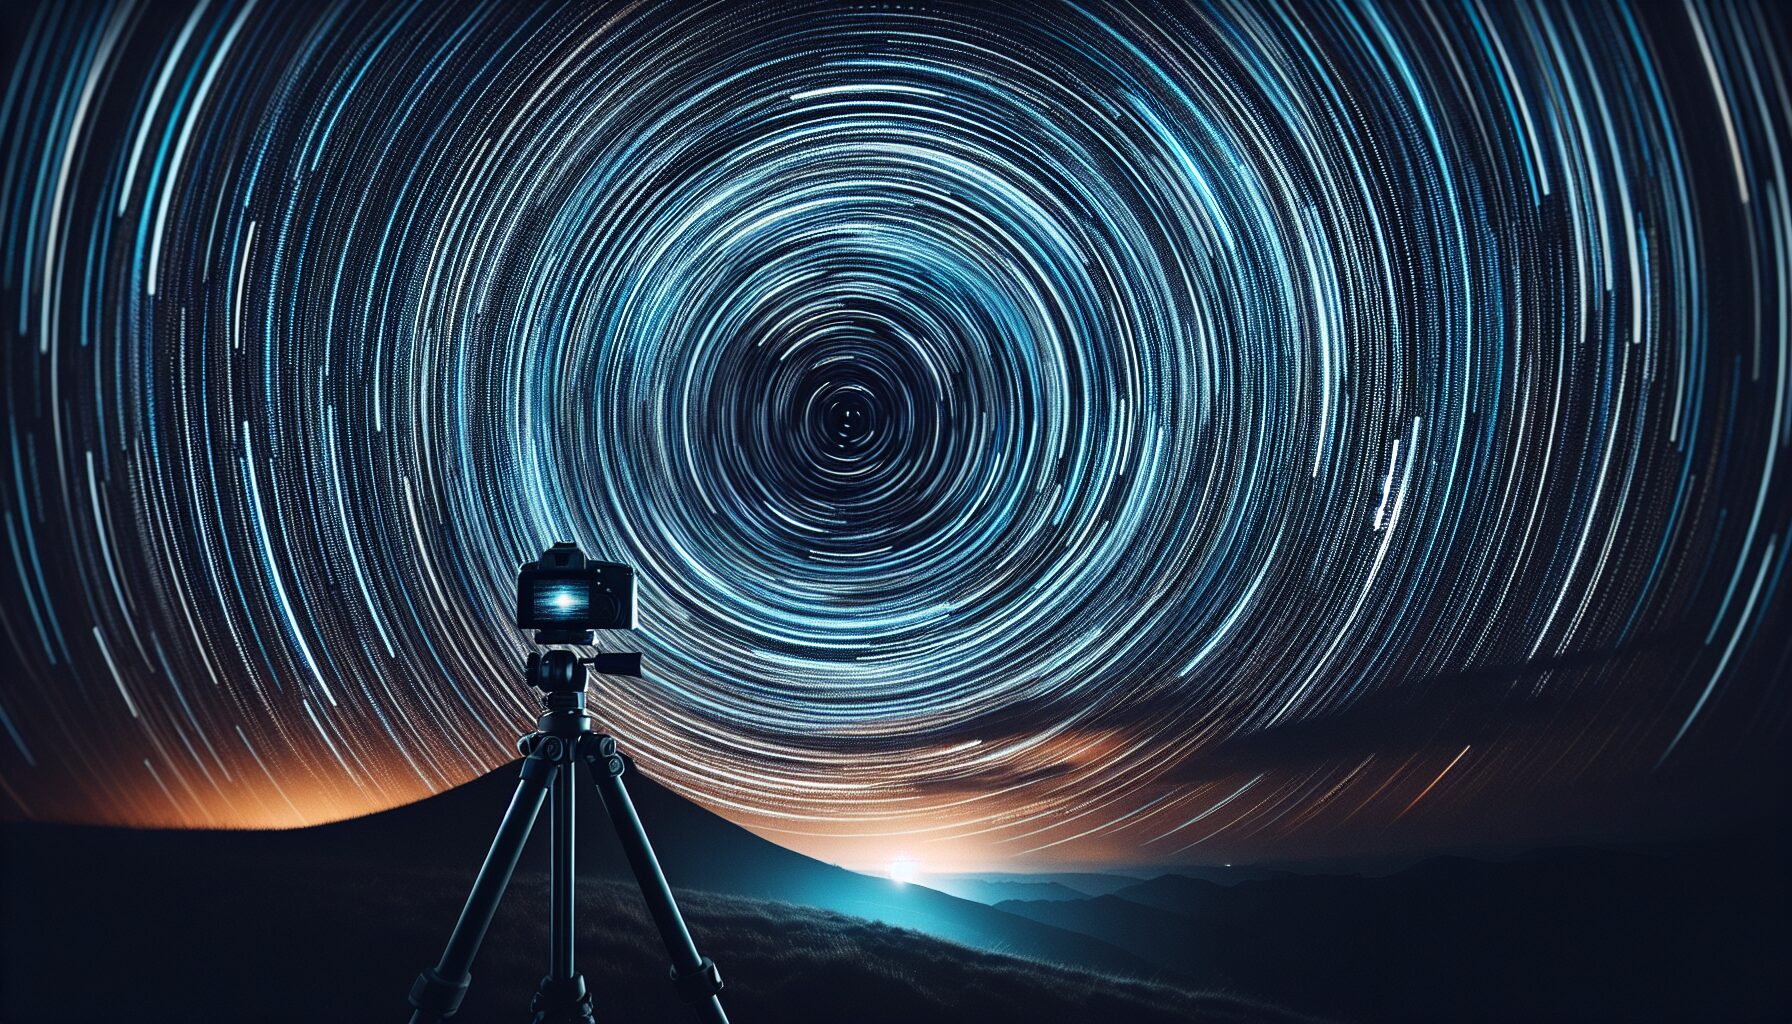
Best Camera Equipment and Settings for Star Trails
Let’s talk about the gear you’ll need to capture those magical star trails in Pakistan’s stunning landscapes. I remember setting up my first shot near the foothills of the Karakoram Range, using a camera with a full-frame sensor to make the most of the low-light conditions. A sturdy tripod is your best friend here; it keeps your camera steady for those long exposures. I’ve found that a remote shutter release is invaluable to avoid any camera shake.
Essential Settings
For star trails, you’ll want to use a manual mode. Set your camera to a low ISO; something between 400 to 800 should do the trick, reducing noise. I once experimented with a 30-minute exposure using an f/2.8 aperture, capturing the mesmerizing circular trails over Lahore Fort. Just remember, longer exposures mean more dramatic trails.
- ISO: Set between 400-800 to minimize noise.
- Aperture: Use f/2.8 or similar to allow more light in.
- Shutter Speed: Experiment with long exposures, starting from 15 minutes.
If you’re near urban areas like Islamabad, consider using a light pollution filter. It helps in cutting down the unwanted glare from city lights. And don’t forget your lens hood to prevent any stray light from hitting your lens.
Ideal Locations in Pakistan for Capturing Star Trails

Pakistan’s night skies offer some of the most breathtaking views for capturing star trails. When I first ventured to the Skardu Valley, I was blown away by its pristine beauty. The valley’s elevation provides clear skies nearly untouched by light pollution. I remember using a full-frame camera with a wide-angle lens to capture the expansive celestial dance. My setup included a sturdy tripod to ensure stability during those long exposure shots, often around 30 minutes or more.
Another gem is the Deosai National Park, known as the ‘Land of Giants’. Located at an elevation of about 4,114 meters, it offers a panoramic view of the Milky Way. The high altitude and remote location make it ideal for star photography. I used a remote shutter release here to minimize camera shake and capture seamless star trails. Make sure to layer up; it gets chilly even in the summer!
Top Tips for Star Trail Photography
- Check the moon phase using an app. A new moon night provides darker skies.
- Use a red flashlight to preserve your night vision while adjusting your settings.
- Plan your shoot using apps like `PhotoPills` to track star movements.
- A report by NASA highlights the importance of minimal light pollution for astrophotography.
Each of these locations offers a unique charm. Whether it’s the solitude of Skardu or the vastness of Deosai, you’ll find plenty of inspiration under Pakistan’s starry skies. Just grab your gear and embark on this celestial journey!
Advanced Techniques for Enhancing Star Trail Images
When I first ventured into capturing star trails in the serene deserts of Thar, I realized there’s more to it than just pointing your camera skyward. For those looking to elevate their star trail photos, let’s dive into some advanced techniques tailored for Pakistani photographers in 2025.
Layering for Dramatic Effect
One technique I loved was layering multiple exposures. By taking several shorter exposures (like 20-30 seconds), instead of a single long one, I avoided overexposing the foreground. I then stacked these images using software like Adobe Photoshop. This method not only reduces noise but also creates a cleaner, more dynamic star trail image.
Incorporate Light Painting
To add depth, try light painting. During your shoot, use a headlamp to softly illuminate the foreground elements. When I photographed near the historic Rohtas Fort, I used a warm-colored LED to highlight the ancient walls, adding an enchanting glow against the starry backdrop.
Timing and Location
Timing is everything. Plan your shoot during a new moon to maximize star visibility. Use apps like Stellarium to track the Milky Way’s position. For those interested in more night sky insights, check out our comprehensive guide to night sky photography in Pakistan.
Gear Tips
- Use a full-frame camera for better low-light performance.
- A sturdy tripod is essential to avoid motion blur.
- Invest in a wide-angle lens to capture expansive sky scenes.
These techniques can transform how you capture star trails, especially in Pakistan’s diverse landscapes. Happy shooting!
Post-Processing Tips to Make Star Trails Stand Out
Alright, let’s dive into the magic of post-processing to make your star trails truly pop. Trust me, with a few tweaks, you’ll transform those images into something extraordinary. I remember when I first shot star trails over the serene lakes of Kaghan Valley. The raw images were decent, but it was the post-processing that brought them to life.
Start with Basic Adjustments
Begin by adjusting the exposure, contrast, and highlights. Increasing the exposure slightly can bring out the trails, while adjusting contrast will make them stand out against the night sky. I often use a tool like `Adobe Lightroom` for these basic edits.
Enhance Colors
Boosting the saturation and vibrance can make a huge difference. It brings out the natural colors of the trails. Be cautious not to overdo it, though. You want your image to look vibrant, not artificial.
Noise Reduction
Long exposures often introduce noise. Use a noise reduction tool to clean up the image. I love using `Topaz DeNoise AI` for its ability to maintain details while reducing noise.
Layering for Impact
For those really stunning effects, consider layering multiple exposures. This technique helps enhance the density and brightness of the star trails. When I tried this over Skardu’s night sky, the results were breathtaking—each trail was bold and vivid.
Final Touches
Finally, add a touch of sharpening to define the edges of the trails. This step ensures your star trails don’t appear blurred. It’s the final polish that can make your photograph a masterpiece.
- Basic Adjustments: Exposure, Contrast
- Color Enhancement: Saturation, Vibrance
- Noise Reduction: Tools like `Topaz DeNoise AI`
- Layering Exposures
- Final Touches: Sharpening
Common Mistakes to Avoid in Star Trail Photography

One of the sneakiest pitfalls in star trail photography is forgetting to check your camera settings. I remember my first time shooting near the serene banks of Lake Saiful Muluk. I was so excited that I forgot to switch my camera from JPEG to RAW. RAW files give you way more flexibility in post-processing, especially when dealing with the dynamic range of night skies.
Watch Your Focus
Another biggie is focus. It’s essential to get your stars sharp. Once, while shooting in the Cholistan Desert, I spent hours capturing trails only to find them blurry because I hadn’t used manual focus. Always switch off autofocus and use live view to zoom in on a bright star to focus manually.
Battery and Storage
- Bring extra batteries. Cold nights drain them faster than you’d think.
- Make sure your memory card has ample space. Star trails often need hundreds of exposures.
Trust me, you don’t want to run out of juice or memory when the sky’s putting on its best show!
Light Pollution
Light pollution can ruin your shots. I learned this the hard way near Lahore, where city lights crept into my frames. Use apps like `Light Pollution Map` to find dark sky locations. The Hingol National Park is a fantastic spot with minimal artificial light.
By keeping these tips in mind, you’ll dodge common mistakes and focus on capturing those breathtaking star trails that make the nighttime in Pakistan so magical.
Conclusion
While capturing star trails in Pakistan, you’ll discover it’s a mesmerizing experience. The vast skies over the Karakoram range or the serene deserts of Thar Desert offer perfect canvases for this celestial art. Just imagine setting your camera with a full-frame sensor on a sturdy tripod, adjusting your exposure settings to a 30-second shutter speed, and watching the magic unfold. It’s like painting with stars!
A few years ago, I ventured to Deosai National Park, known for its minimal light pollution. With a wide-angle lens, I set the ISO to 1600 to capture the faintest stars, ensuring the trails appeared as glowing arcs across the sky. It was chilly, but the breathtaking view was worth every shiver.
Patience is key. You might spend hours under the stars, but when you finally review the shots—oh, the joy! The trick is to embrace the night’s silence and let the universe reveal its secrets through your lens. Remember, practice makes perfect, and each attempt brings you closer to capturing those stunning star trails.
So, grab your camera, embrace the adventure, and let the Pakistani night skies inspire you. With the right techniques and gear, you’re all set to create your own celestial masterpieces. Happy stargazing!
Continue Exploring
Embark on a celestial journey through Pakistan's starry skies! Uncover the best locations, essential tips, and must-have gear for breathtaking night sky photography.
Frequently Asked Questions
What are the best techniques for capturing star trails in Pakistan's unique night skies?
To capture stunning star trails in Pakistan, start by choosing a location with minimal light pollution, such as the remote areas of Balochistan or the mountainous regions in the north. Use a sturdy tripod to keep your camera stable and set your camera to manual mode. Opt for a wide-angle lens with a low f-stop number to capture as much light as possible. Experiment with long exposure times, typically ranging from 15 minutes to several hours, to create dramatic star trails. Don’t forget to use a remote shutter release or a camera app to prevent any movement during the exposure.
What gear do Pakistani photographers need for star trail photography in 2025?
In 2025, Pakistani photographers looking to capture star trails should invest in a reliable DSLR or mirrorless camera with excellent low-light performance. A wide-angle lens with a fast aperture, such as f/2.8 or lower, is essential. A sturdy tripod is a must to avoid camera shake during long exposures. Additionally, a star tracker can be beneficial for keeping stars in focus during extended exposures. Extra batteries and memory cards are also important due to the long duration of star trail photography sessions.
Where are the top locations in Pakistan for photographing star trails?
Pakistan offers several breathtaking locations for star trail photography. The Skardu region, with its clear skies and stunning mountainous backdrop, is perfect for capturing vibrant star trails. The Kalash Valley, known for its remote and dark skies, provides an excellent opportunity to photograph the night sky without light pollution. Additionally, the deserts of Tharparkar offer a unique landscape for star trail compositions. Always check local conditions and obtain necessary permissions when planning your photography trips to these areas.
Leave a Reply